Before we jump into how to use Python, you need to have Python. This tutorial will get you set up with a Python development environment that will make MATLAB users feel right at home.
Python is a programming language with a broad scope that can be applied to nearly any programming situation. While MATLAB is owned and maintained by one entity, Python supports add-ons created by the community. Whatever you need to do in your project, there is a Python library for it. This makes Python versatile, but also quite intimidating to get started with. These tutorials will get you to grips with the basics of programming in Python for data analysis, using an environment that will be familiar to MATLAB users.
Python is a programming language with a broad scope that can be applied to nearly any programming situation. While MATLAB is owned and maintained by one entity, Python supports add-ons created by the community. Whatever you need to do in your project, there is a Python library for it. This makes Python versatile, but also quite intimidating to get started with. These tutorials will get you to grips with the basics of programming in Python for data analysis, using an environment that will be familiar to MATLAB users.
Installing Anaconda
Anaconda is a free distribution of Python (and R) which focusses on scientific computing (data analysis, machine learning, and statistical analysis). It comes with Spyder, which is a development environment that provides similar functionality to MATLAB. Click the link below, and select the Python 3.x* version for your operating system.
Follow the instructions for installing Anaconda. Note the installation location, this is where your entire Python environment will be based! Once installed, open up Anaconda-Navigator. You should see something like this:
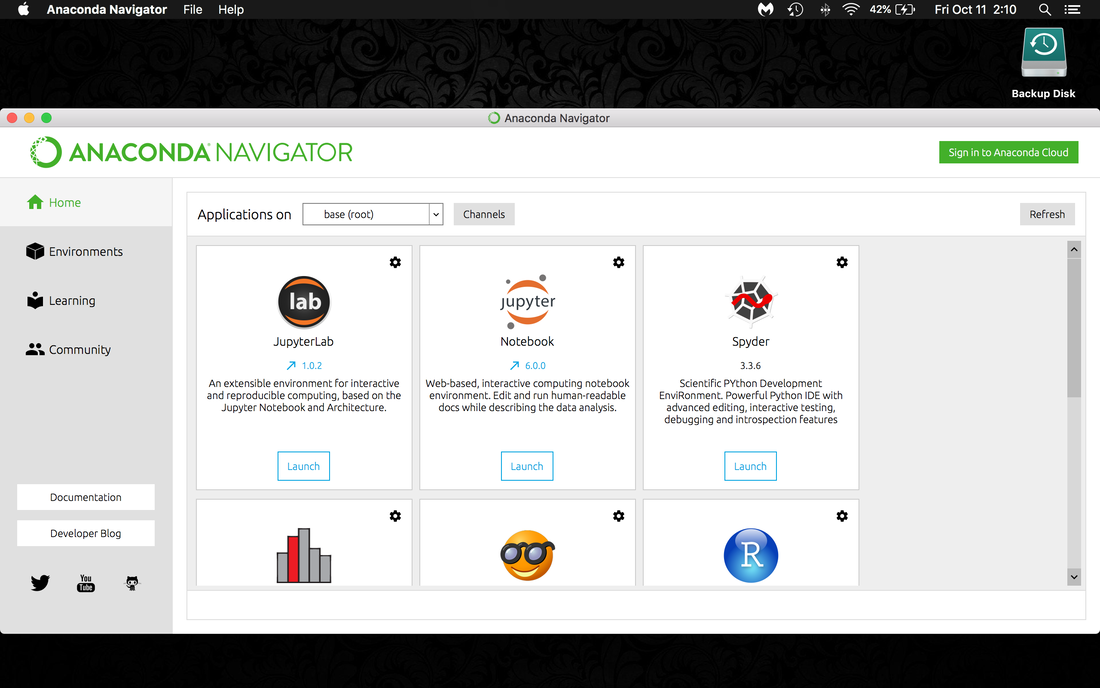
This is the "dashboard" for Anaconda. As you can see, Anaconda comes with several options for Python development. Note the "Documentation" button on the left. Launch Spyder (Scientific Python Development Environment).
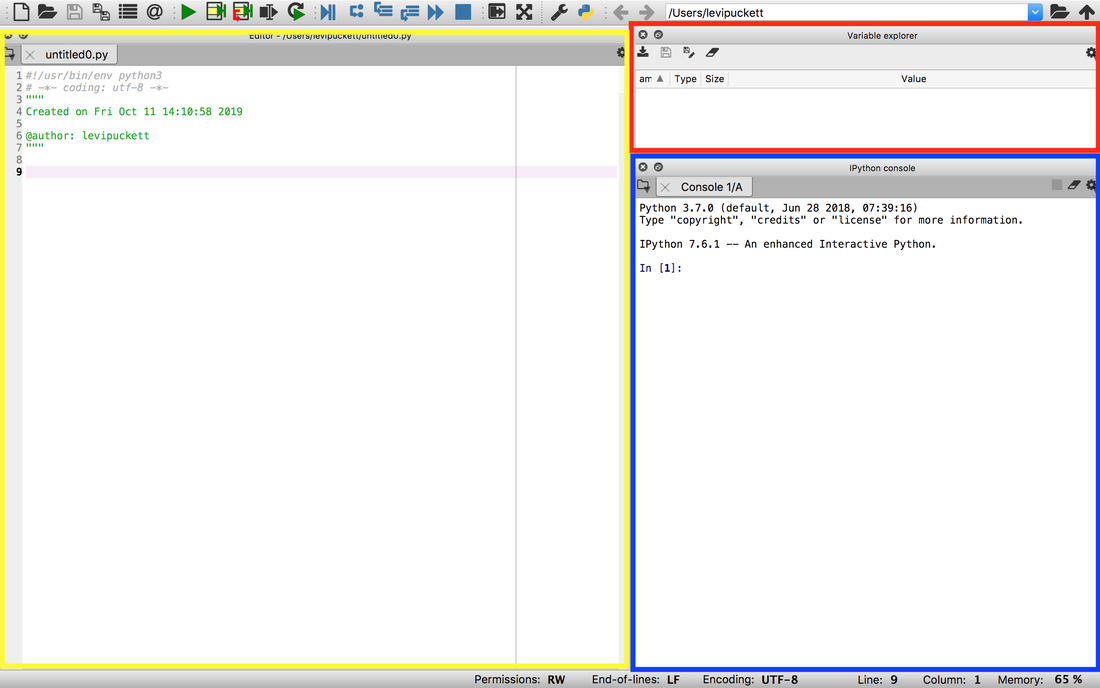
Welcome to Spyder. The three coloured boxes show different "panes" in the window. If you don't like the way it is laid out, you can move panes freely by clicking the windowing button (next to the 'x' on each pane) and dragging to where you see fit. If you are missing a pane, or want to hide one, select View -> Panes and select the pane you want to see.
In this screenshot, we have three panes:
In this screenshot, we have three panes:
- Blue - Python console. This is the Python interpreter, which runs any code that you write. Program output and error messages are displayed here. The interpreter can be used to run code line-by-line, like the MATLAB command window.
- Yellow - Editor. The editor pane lets you view and edit files in your project.
- Red - Variable Explorer. This shows the contents of any variables currently in your workspace. It is analogous to "Workspace" in MATLAB.
Now that our environment is ready to go, head over to the "Hello, world!" tutorial to start writing code!
If you are having difficulties with the Anaconda or Python setup, the Anaconda documentation is very helpful for resolving issues.
If you are having difficulties with the Anaconda or Python setup, the Anaconda documentation is very helpful for resolving issues.
* Python 2.x is the old version of the language which is slowly going out of vogue. Beginners will be better off learning 3.x from the start