.Welcome to the MATLAB Tutorial. This tutorial is not designed to teach you everything there is to know about MATLAB - it is designed to give graduate students in Psychology and Neuroscience the basic tools they need to analyze data and to program experiments.
First of all, you will need a copy of MATLAB. Mathworks (the makers of MATLAB) release two versions a year, "a" and "b". This tutorial was built using 2016a so I cannot guarantee it will work on earlier versions of MATLAB. Further, MATLAB comes with numerous add on toolboxes - some free, some paid. This tutorial does rely on some of the paid toolboxes that come with most installations of MATLAB (e.g., the Signal Processing Toolbox).
So, before we begin:
1. Install MATLAB 2016a or a more recent version.
2. Download and install the Psychtoolbox (for programming experiments). See http://psychtoolbox.org/download/.
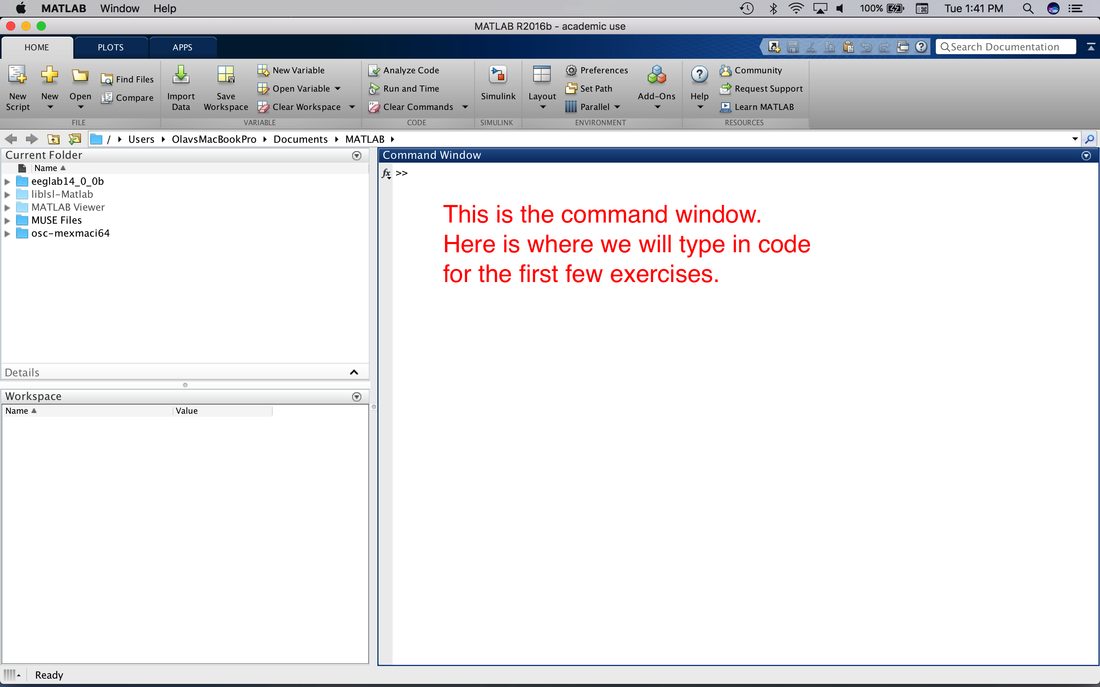
Once you have done both of these steps, start MATLAB and you should see
Actually, you will not see the writing in red. This is just to indicate where to type for the exercise below.
MATLAB is a programming language. You can type commands directly into the command window and execute them in real time. In later lessons, we will write scripts (i.e., programs) wherein you write down a bunch of commands that run sequentially when the script is executed.
For now, in the command window type:
disp('Hello World!');
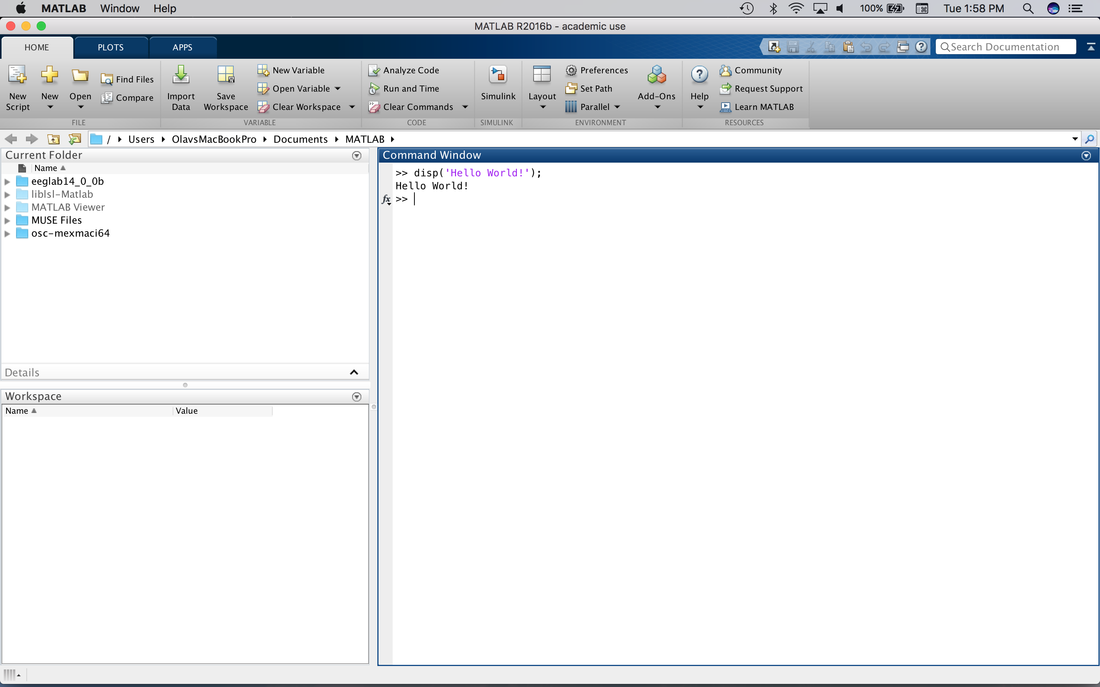
and hit enter. You should see the following
You have just written your first program. You have literally told MATLAB to display (disp) the text that is in the quotation marks. Take a careful note of the syntax. Programming languages can only do what you tell them to do. Most of the frustration I have seen with students is quickly solved when I point out they have made a typographical error.
In this case, the text for disp needs to be in quotation marks within circular brackets. To tell MATLAB the command is over, you finish with a semicolon.
Try displaying some more text on your own.
Helpful hint. If you want to clear the command window so it is fresh, use clc. Try this now, type in clc on a new line and hit enter. You should see the command window is now cleared. If you want to scroll back to previous commands, use the up arrow. Try this now to scroll back and execute the disp('Hello World!'); command again. You will have to hit enter once you have found it.
If you are happy with all of this, move onto Tutorial 1.2.

